- Installation
- Post installations
- Update du système, installation des packages utiles
- Clavier FR et timezone
- Switch du shell vers zsh
- Configuration réseau
- Changement du password root
- Blocage connexion SSH par login/password et publication clés SSH
- Crontab
- Envoi de mails
- Firmware / système
- Caméra
- Bluetooth (sur Raspberry PI 3)
- WiFi (sur Raspberry PI 3)
- Installation de java (oracle)
- Tests
- Cleanups
- Liens supplémentaires
Installation
Archlinux est probablement un des meilleurs choix pour Raspberry de par le principe de rolling-release (permettant de ne jamais avoir à réinstaller le système).
Formater la carte SD avec SDFormatter :
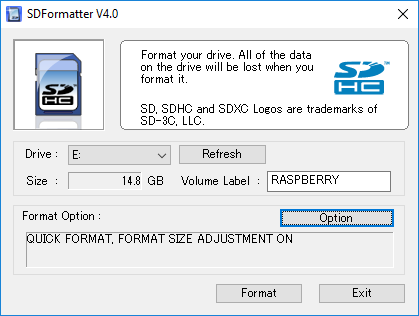
Clicker sur ‘Options’ 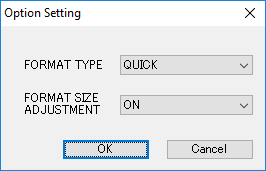
Activer l’option ‘format size adjustment’ Dézipper le contenu de l’installeur
PINN(dérivé deNOOBS, et permettant, entre autre, l’installation d’Archlinux) :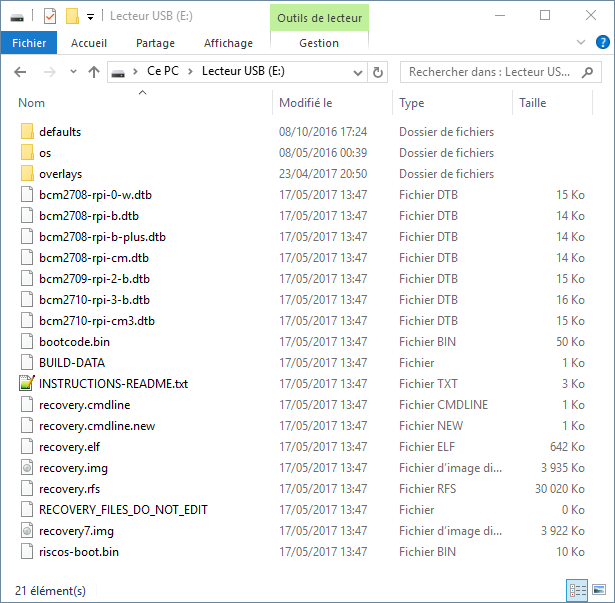
Tous les fichiers doivent être directement à la racine Booter sur le raspberry
- soit de manière traditionnelle (écran / clavier obligatoires)
- soit en ajoutant le mot clé
vncinstall(voir le github NOOBS) sur la clé USB à la fin de la ligne de commande du fichierrecovery.cmdline(la sortie HDMI ne sera alors pas utilisée, mais il sera possible de se connecter depuis une autre machine via VNC (par ex. avec TightVNCViewer), après avoir récupéré l’adresse IP du raspberry, par ex. depuis le routeur (le raspberry apparaîtra sans doute avec le nomrecovery) ; et dans ce cas, les deux seuls branchements nécessaires sont RJ45 et alimentation)
Procéder à l’installation : touche
gpour changer la langue, puisipour installer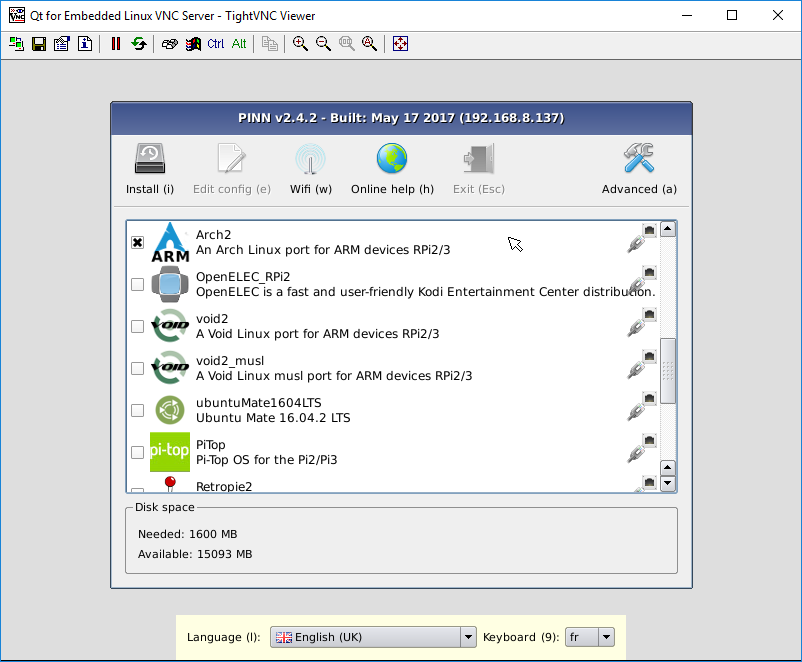
Comptes & passwords :
root/root(remarque : par défaut, le compte n’est pas utilisable par SSH)alarm/alarm
Liens :
- Documentation officielle de la distribution archlinux sur raspberry (voir notamment la F.A.Q.) : https://archlinuxarm.org/platforms/armv7/broadcom/raspberry-pi-2
- Site officiel du projet
PINN: https://github.com/procount/pinn - Download de la distribution
PINN(prendrepinn-lite.zip) : https://sourceforge.net/projects/pinn/files/?source=navbar
Post installations
Update du système, installation des packages utiles
pacman -Syu
pacman -S zsh unzip unrar htop git vim cronie raspberrypi-firmware wget curl cower fakeroot expac sudo reflector
Ajouter des couleurs à pacman :
sed -i 's/#Color/Color/' /etc/pacman.conf
Activation des repositories les plus rapides :
reflector -l 35 -p https --threads 5 --sort rate --save /etc/pacman.d/mirrorlist
Clavier FR et timezone
Passer au besoin temporairement puis définitivement le clavier en français (documentation archlinux correspondante) :
loadkeys fr-latin9
echo "keymap=fr-latin9" >> /etc/vconsole.conf
Timezone :
timedatectl set-timezone Europe/Paris
Switch du shell vers zsh
Changer via un vi /etc/passwd le shell configuré pour le compte root (switch de /bin/bash en /bin/zsh).
Déployer un fichier de configuration ZSH .zshrc pour avoir le minimum d’alias, functions, … :
wget TODO LIEN
Configuration réseau
Changer le hostname de la machine :
echo "raspberry-pi1-1" > hostname
Retrouver l’adresse IP pour la déclarer en IP fixe côté routeur (pour que le raspberry ait toujours la même adresse en DHCP) :
ifconfig
Activer ntp pour avoir l’heure toujours à jours :
pacman -S ntp
systemctl enable ntpd.service
systemctl start ntpd.service
Changement du password root
passwd
Blocage connexion SSH par login/password et publication clés SSH
Ajouter/changer sur un vi /etc/ssh/sshd_config :
PermitRootLogin yes
PasswordAuthentication no
ChallengeResponseAuthentication no
Redémarrer le daemon SSHD (puis faire un test depuis une autre machine !) :
systemd restart sshd
Pousser les clés publiques d’un autre compte et d’une autre machine linux vers le raspberry :
ssh-copy-id root@192.168.0.x # adresse IP raspberry PI
Générer au besoin une clé locale au raspberry (en mode RSA par défaut), à diffuser ensuite sur d’autres machines au besoin (pour usages scp, etc.) :
ssh-keygen
Crontab
Ajouter sur un crontab -e les opérations suivantes (purge des logs, backup de la cron, maj du repository des paquets (ici sans installer les paquets eux-même en automatique)) :
# min 			hour	day	month	day of week	command
LANG=fr_FR.UTF-8
LANGUAGE=fr
LC_CTYPE=fr_FR.UTF-8
PYTHONIOENCODING=utf-8

0			*	*	*	*		pacman -Sy > /var/log/cron-pacman-sy.log 2>&1
0			1	*	*	*		crontab -l > /root/crontab.backup 2>&1
45			2	*	*	*		journalctl --vacuum-time=45d > /var/log/cron-journalctl-purge.log 2>&1
Puis activer la crontab :
systemctl enable cronie
systemctl start cronie
Envoi de mails
Configuration permettant :
- de ne plus avoir les messages liés à la crontab dans le journal sur un
journalctl -xe - d’envoyer des mails en ligne de commande
pacman -S ssmtp
Puis vi /etc/ssmtp/ssmtp.conf :
#
# /etc/ssmtp.conf -- a config file for sSMTP sendmail.
#

# The place where the mail goes. The actual machine name is required
# no MX records are consulted. Commonly mailhosts are named mail.domain.com
# The example will fit if you are in domain.com and you mailhub is so named.
mailhub=smtp.gmail.com:587

# The address where the mail appears to come from for user authentication.
rewriteDomain=gmail.com

# Use SSL/TLS before starting negotiation
UseTLS=Yes
UseSTARTTLS=Yes

# Email 'From header's can override the default domain?
FromLineOverride=yes

# The person who gets all mail for userids < 1000
# Make this empty to disable rewriting.
root=webmaster@domain.tld

# Username/Password
AuthUser=webmaster@domain.tld
AuthPass=xxxxxxxxxxxxxxxxxxxx

# The full hostname
hostname=my_server
Pour référence, la configuration par défaut (à remplacer par celle ci-dessus) :
#
# /etc/ssmtp.conf -- a config file for sSMTP sendmail.
#
# The person who gets all mail for userids < 1000
# Make this empty to disable rewriting.
root=postmaster
# The place where the mail goes. The actual machine name is required
# no MX records are consulted. Commonly mailhosts are named mail.domain.com
# The example will fit if you are in domain.com and you mailhub is so named.
mailhub=mail
# Where will the mail seem to come from?
#rewriteDomain=y
# The full hostname
hostname=localhost.localdomain
Pour envoyer un mail :
echo "Job terminated without errors" | mail -v -s "Execution summary" "webmaster@domain.tld"
Firmware / système
Firmware
Pour upgrader le firmware du raspberry pi :
pacman -S binutils
wget https://raw.github.com/Hexxeh/rpi-update/master/rpi-update -O /usr/bin/rpi-update
chmod +x /usr/bin/rpi-update
/usr/bin/rpi-update
raspi-config
Pour récupérer raspi-config (attention, ne fonctionne pas sur archlinux, mais permet de “lire” certaines configurations attendues) :
wget https://raw.githubusercontent.com/RPi-Distro/raspi-config/master/raspi-config
chmod a+x raspi-config
Packages AUR
Installation un outil de management des packages additionnels AUR (pacaur) :
- Depuis un
vi /etc/sudoersajouter la lignealarm ALL=(ALL) ALL - Executer les commandes suivantes :
su alarm
cd /tmp/
git clone https://aur.archlinux.org/pacaur.git
cd pacaur
makepkg -i
exit
pacaur -Syu
Remarque : nécessité d’avoir installé au préalable les packagers fakeroot, expac, sudo
Optimisation FS
Pour minimiser les accès sur les cartes SD au niveau du filesystem, désactiver le stockage des timestamps d’accès aux fichiers. Depuis vi /etc/fstab, modifier defaults en defaults,nodiratime,noatime,discard, exemple :
/dev/mmcblk0p6 /boot vfat defaults,nodiratime,noatime,discard 0 0
Caméra
Configuration
Au sein du fichier /boot/config.txt, ajouter/modifier :
gpu_mem=144  # 128M not anymore enough since may 2016
start_file=start_x.elf
fixup_file=fixup_x.dat

# optionnellement
disable_camera_led=1

# au besoin
# cma_lwm=
# cma_hwm=
# cma_offline_start=
Puis :
echo "blacklist i2c_bcm2708" > /etc/modprobe.d/blacklist.conf
echo "bcm2835-v4l2" > /etc/modules-load.d/rpi-camera.conf
echo "options bcm2835-v4l2 max_video_width=3240 max_video_height=2464" > /etc/modprobe.d/rpi-camera.conf
Streaming avec VLC
Solution la plus simple/rapide à déployer. Très forte latence (plus de 5s d’écart sur la vidéo), consommation CPU importante.
pacman -S vlc
Déclenchement du streaming (avec un autre compte que root) :
su - alarm
/opt/vc/bin/raspivid -o - -t 0 -n | cvlc -vvv stream:///dev/stdin --sout '#rtp{sdp=rtsp://:8554/}' :demux=h264
L’accès depuis une autre machine (windows, linux, …) se fait en installant VLC, puis en ouvrant un flux réseau depuis l’URL http://rstp:192.168.0.x:8554/.
Streaming avec mjpg-streamer
Solution intéressante, relativement facile à installer, peut ne pas être trop gourmande niveau CPU si le nombre d’images configurées reste faible. Egalement une latence assez élevée de 4-5 secondes.
L’installation se fait depuis un package AUR :
su alarm
pacaur -S mjpg-streamer
exit
mkdir /root/www
echo '<img alt="" src="http://192.168.8.45:8090/?action=stream" width="1280" height="960" />' > /root/www/index.html
mjpg_streamer -i "input_uvc.so -n -f 4 -r 1280x960" -o "output_http.so -n -w /root/www -p 8090"
Créer le fichier /usr/lib/systemd/system/mjpg.service pour pemrmettre le lancement automatique de mjpg_streamer au boot :
# Arch Linux systemd daemon script

[Unit]
Description=MJPG Streamer

[Service]
ExecStart=/usr/bin/mjpg_streamer -i "input_uvc.so -n -f 4 -r 1280x960" -o "output_http.so -n -w /root/www -p 8090"

[Install]
WantedBy=multi-user.target
Activer / démarrer le service :
systemctl enable mjpg.service
systemctl start mjpg.service
Visualiser les logs avec journalctl -xe :
May 18 13:23:47 callisto mjpg_streamer[264]: MJPG-streamer [264]: starting application
May 18 13:23:47 callisto mjpg_streamer[264]: MJPG Streamer Version.: 2.0
May 18 13:23:47 callisto mjpg_streamer[264]: MJPG-streamer [264]: MJPG Streamer Version.: 2.0
May 18 13:23:47 callisto mjpg_streamer[264]:  i: Using V4L2 device.: /dev/video0
May 18 13:23:47 callisto mjpg_streamer[264]: MJPG-streamer [264]: Using V4L2 device.: /dev/video0
May 18 13:23:47 callisto mjpg_streamer[264]:  i: Desired Resolution: 1280 x 960
May 18 13:23:47 callisto mjpg_streamer[264]:  i: Frames Per Second.: 4
May 18 13:23:47 callisto mjpg_streamer[264]:  i: Format............: MJPEG
May 18 13:23:47 callisto mjpg_streamer[264]: MJPG-streamer [264]: Desired Resolution: 1280 x 960
May 18 13:23:47 callisto mjpg_streamer[264]: MJPG-streamer [264]: Frames Per Second.: 4
May 18 13:23:47 callisto mjpg_streamer[264]:  o: www-folder-path...: /root/www/
May 18 13:23:47 callisto mjpg_streamer[264]:  o: HTTP TCP port.....: 8090
May 18 13:23:47 callisto mjpg_streamer[264]:  o: username:password.: disabled
May 18 13:23:47 callisto mjpg_streamer[264]:  o: commands..........: disabled
May 18 13:23:47 callisto mjpg_streamer[264]: MJPG-streamer [264]: Format............: MJPEG
May 18 13:23:47 callisto mjpg_streamer[264]: MJPG-streamer [264]: www-folder-path...: /root/www/
May 18 13:23:47 callisto mjpg_streamer[264]: MJPG-streamer [264]: HTTP TCP port.....: 8090
May 18 13:23:47 callisto mjpg_streamer[264]: MJPG-streamer [264]: username:password.: disabled
May 18 13:23:47 callisto mjpg_streamer[264]: MJPG-streamer [264]: commands..........: disabled
May 18 13:23:47 callisto mjpg_streamer[264]: MJPG-streamer [264]: starting input plugin
May 18 13:23:47 callisto mjpg_streamer[264]: MJPG-streamer [264]: starting output plugin: output_http.so (ID: 00)
Ouvrir l’URL http://192.168.8.45:8090/ sur une autre machine (ou au besoin, par exemple sous openhab, utiliser l’URL http://192.168.8.45:8090/?action=stream).
Performances :
-f 15= 15 images par secondes = 40% de CPU sur un raspberry pi 2 / 42°-f 5= 5 images par secondes = 23% de CPU sur un raspberry pi 2 / 40°-f 2= 2 images par secondes = 2% de CPU sur un raspberry pi 2 / 40°-f 1= 1 image par secondes = 4% de CPU sur un raspberry pi 2 / 39.5°
Voir : https://wolfpaulus.com/embedded/raspberrypi_webcam/
Streaming avec VL42RtspServer
WARNING : semble efficace à l’usage mais chapitre non finalisé (compilation difficile sous archlinux).
Lien du projet : https://github.com/mpromonet/v4l2rtspserver
Préparation du système :
pacman -S base-devel cmake
Puis suivre les installations de compilation données sur le site officiel du projet.
wget http://www.live555.com/liveMedia/public/live555-latest.tar.gz -O - | tar xvzf -
cd live
./genMakefiles linux
make CPPFLAGS=-DALLOW_RTSP_SERVER_PORT_REUSE=1 install
Compter environ 15 minutes de compilation sur un Raspberry PI 2 pour cette précédente étape. Puis compiler le projet lui-même :
git clone https://github.com/mpromonet/v4l2rtspserver
cd v4l2rtspserver
cmake . && make
TODO : installation liblivemedia + liblog4cpp …
A lire : http://stephane.lavirotte.com/perso/rov/video_streaming_pi1.html
Bluetooth (sur Raspberry PI 3)
Procéder à l’installation du package (depuis AUR) puis du service nécessaire :
pacman -S base-devel
su alarm
pacaur -S pi-bluetooth
exit
systemctl enable brcm43438.service
reboot
Après le reboot, vérifier que tout est ok via dmesg|grep -i blue :
[    7.120573] Bluetooth: Core ver 2.22
[    7.120913] Bluetooth: HCI device and connection manager initialized
[    7.121103] Bluetooth: HCI socket layer initialized
[    7.121251] Bluetooth: L2CAP socket layer initialized
[    7.121428] Bluetooth: SCO socket layer initialized
[    7.134216] Bluetooth: HCI UART driver ver 2.3
[    7.134382] Bluetooth: HCI UART protocol H4 registered
[    7.134528] Bluetooth: HCI UART protocol Three-wire (H5) registered
[    7.134858] Bluetooth: HCI UART protocol Broadcom registered
WiFi (sur Raspberry PI 3)
pacman -S wpa_supplicant iw wireless_tools
Si pas de wlan0, voir https://www.raspberrypi.org/forums/viewtopic.php?f=28&t=138629&start=25
curl https://github.com/RPi-Distro/firmware-nonfree/raw/master/brcm80211/brcm/brcmfmac43430-sdio.bin -sLo /lib/firmware/brcm/brcmfmac43430-sdio.bin
curl https://raw.githubusercontent.com/RPi-Distro/firmware-nonfree/master/brcm80211/brcm/brcmfmac43430-sdio.txt -sLo /lib/firmware/brcm/brcmfmac43430-sdio.txt
modprobe -r brcmfmac
modprobe brcmfmac
ifconfig -a
Pour visualiser en ligne de commande les réseaux accessibles :
iwlist wlan0 scan | grep ESSID
                    ESSID:"XXXX-6790"
                    ESSID:"SFR WiFi Mobile"
                    ESSID:"NEUF_52B0"
                    ESSID:"SFR WiFi FON"
                    ESSID:""
                    ESSID:"UNIVERSE2"
                    ESSID:""
                    ESSID:"CHEZJP"
                    ESSID:"Bbox-940B97"
Configurer par assistée par un menu :
wifi-menu -o
Ou configuration manuelle :
cp /etc/netctl/examples/wireless-wpa /etc/netctl
vi /etc/netctl/wireless-wpa
Pour le mot de passe :
wpa_passphrase <SSID> <password>
network={
	ssid="<SSID>"
	#psk="<password>"
	psk=<encrypted_password>
}
ce qui permet ensuite de mettre à jour le fichier sous /etc/netctl/ :
Description='Automatically generated profile by wifi-menu'
Interface=wlan0
Connection=wireless
Security=wpa
ESSID=<ssid>
IP=dhcp
Key=<encrypted_password>
A noter que le champ Key peut devoir être préfixé avec \" (non-quoted string).
Démarrage et activation au boot du wifi :
netctl start wireless-wpa
netctl enable wireless-wpa
Voir : https://wiki.archlinux.fr/Netctl
Installation de java (oracle)
Manuellement
Aller sur le site d’Oracle : http://www.oracle.com/technetwork/java/javase/downloads/jdk8-downloads-2133151.html
Prendre le JDK 8 en version Linux ARM 32 Hard Float ABI, exemple jdk-8u131-linux-arm32-vfp-hflt.tar.gz
Puis le décompresser et l’activer comme version de java principale :
tar zxvf jdk-8u131-linux-arm64-vfp-hflt.tar.gz -C /opt
pacman -S java-environment-common java-runtime-common
ln -sf /opt/jdk1.8.0_131 /usr/lib/jvm/default
ln -sf /opt/jdk1.8.0_131/jre /usr/lib/jvm/default-runtime
java -version
javac -version
Depuis AUR
su alarm
pacaur -S jdk-arm
exit
java -version
Lien : https://aur.archlinux.org/packages/jdk-arm/
Tests
Test caméra :
# Capture an image in jpeg format:
raspistill -t 0 -o test.jpg
# Capture a 5s video in h264 format:
raspivid -o /tmp/out.h264 -t 5000

# Capture a 10s video:
MOVIE=video.h264
raspivid -o $MOVIE -t 10000

# Wrap the bare h264 stream in an MP4 container:
ffmpeg -r 30 -i $MOVIE -vcodec copy $(basename -s .h264 $MOVIE).mp4

# 4x Timelapse with doubled framerate (plus every other frame dropped):
ffmpeg -i $(basename -s .h264 $MOVIE).mp4 -r 60 -filter:v "setpts=0.25*PTS" -an $(basename -s .h264 $MOVIE)_60.mp4

# Capture a 10s video in demo mode:
raspivid -o video.h264 -t 10000 -d

# To see a list of possible options for running raspivid or raspistill, you can run:
raspivid | less
raspistill | less

# Using `raspivid` for continuous capturing
# http://goo.gl/K4YhfF
raspivid -fps 5 -w 640 -h 480 -sg 600000 -t 0 -qp 30 -o /pfad/zur/ext/hdd/test%03d.h264
Test de la mesure de température :
/opt/vc/bin/vcgencmd measure_temp
Cleanups
Nettoyer le cache des packages pacman (inutiles une fois installés) :
rm -f /var/cache/pacman/pkg/*.xz
Liens supplémentaires
Quelques liens supplémentaires.
- Installation d’ArchLinux à la main (sans passer par NOOBS) : https://github.com/phortx/Raspberry-Pi-Setup-Guide